Windmill Assembly


The image on the digi mat, or if you have separate files you can identify them with this image

The next image I have added some support photographs places next to the relevant parts

Firstly cut all your pieces
Start with the Base section


There arre 6 sides to the base, first glue the window frames to the right side of the side sections and then using the glue tabs on each side section of the base glue them together one by one. The large window it the front, the lower arched section is the candle access hole and goes to the back, the 2 sections with smaller windows go either side of the large window section.
Once you have your hexagon shape fold all the glue tabs inwards and glue the bottom and top section to it.
Next
take the platform for railing and the railings
Glue both sections of railings together to form a hexagon shape, and carefully place this central on the platform base section, this can then be glued to the base.
Mid section


There are 6 sides to the mid section, first glue all the window frames to the right side of the sections and then using the glue tabs on each of the 6 sides of the windmill attach them together one by one, the one with the large arch is the back and is the candle access hole. you can decide where how the window section and plain sections go I put a window section either side of the arched section then plain the a window section at the front. Once you have built this section fold the tabs inwards on the bottom and the top then glue on the top and bottom hexagon pieces. then glue this section to the base section. Make sure you center it on the base section.
Sails
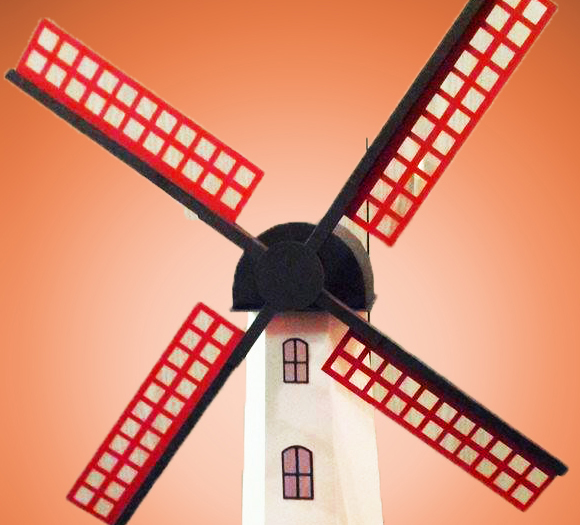

The spine of the sail is a boxed section to give it strength. so make the 4 box sections up and then the sail is attached to the spine and then the whole part then glues to the part which I have showed you in the image below - there are 2 of these glue the sails to one then glue the other one on the other side to help give strength

The upper section


glue one of the sides to the roof and then the other and then glue this to the platform base for upper section
Make the spindle up into a box section and glue one of the round disks to one end which will be the front for the sail section to be glued to
Glue this upper section to the mid section making sure you keep it central
Now put the spindle through the square cut out section in the sides of the upper section make sure you pass it through the front and that it goes right through to and out the back with equal amounts showing on both ends.
Attach the sail section to the front which has the disk, position the sails so that they make a X not a + it looks better if you make a X with them. apply glue and to the disk and hold them until the glue is dry, this will require patience, you may have to hold it in place until the glue sets enough to be able to let it go without the worry of it falling off. Now add the back sail, which is done with attaching the 2 oblong pieces to either side of the disk with the cuts in it. then attach the other ends of the oblong strip to either side of the spindle that comes out the back of the upper section. Give a slight turn to the cut sections of the disk to make it look like it has sails
Purchase this design Here
No comments:
Post a Comment